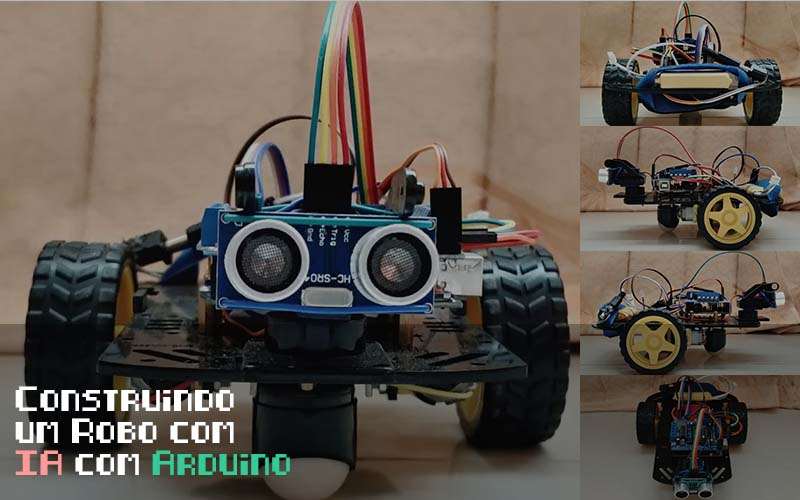
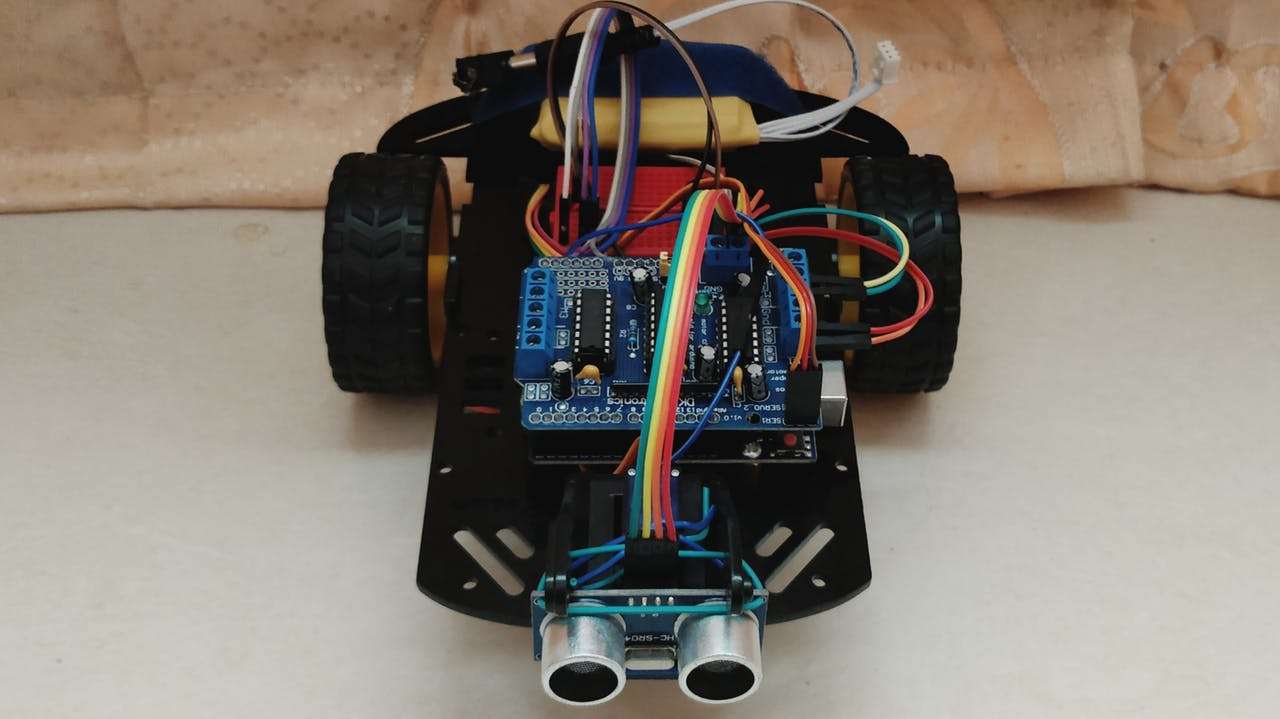
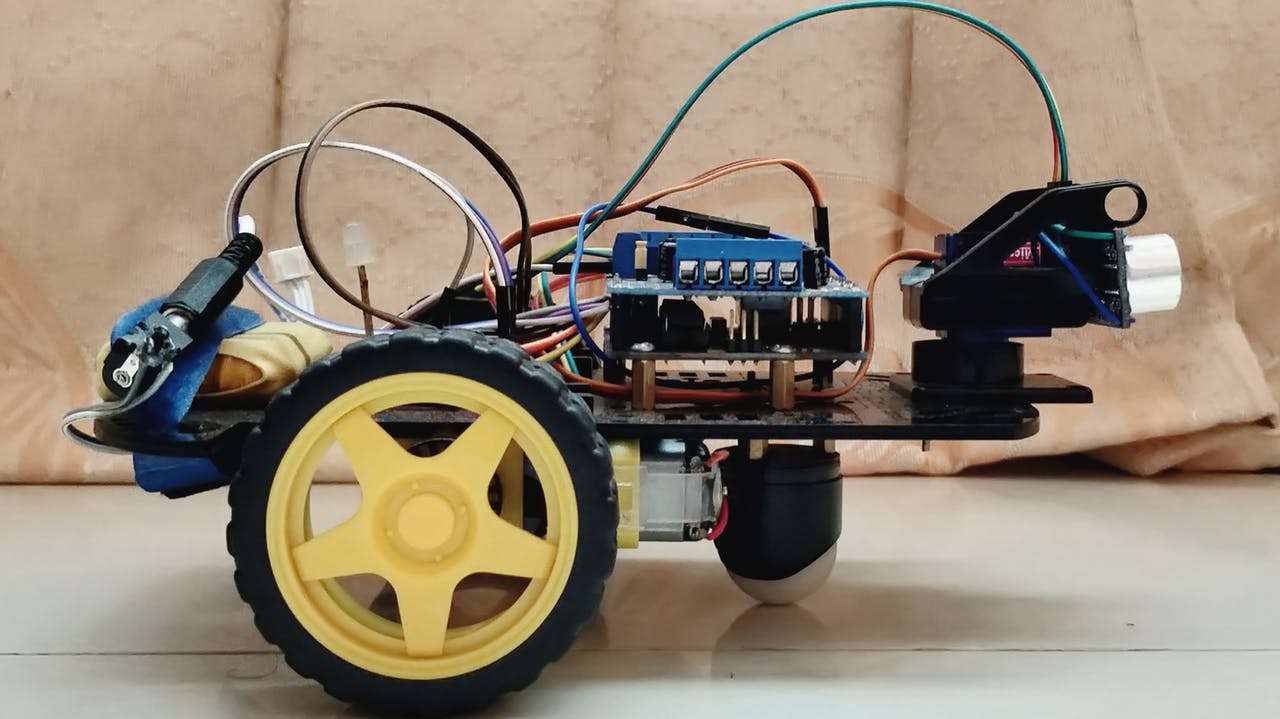
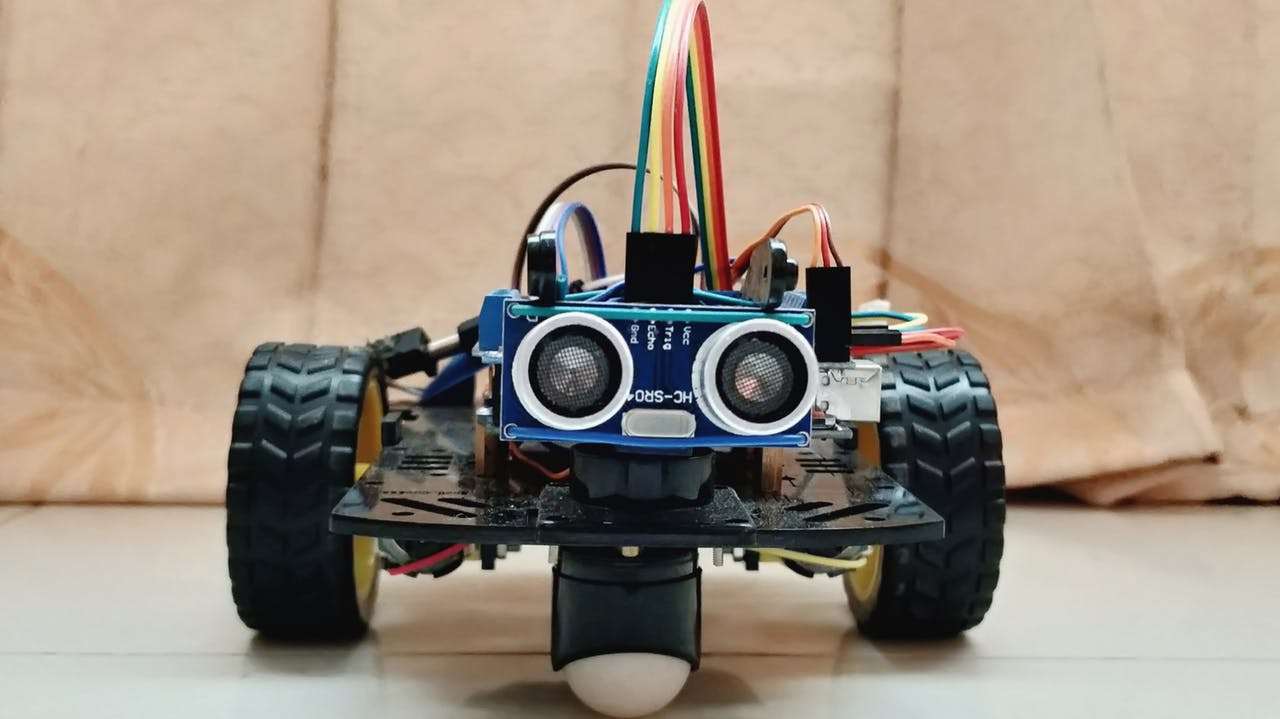
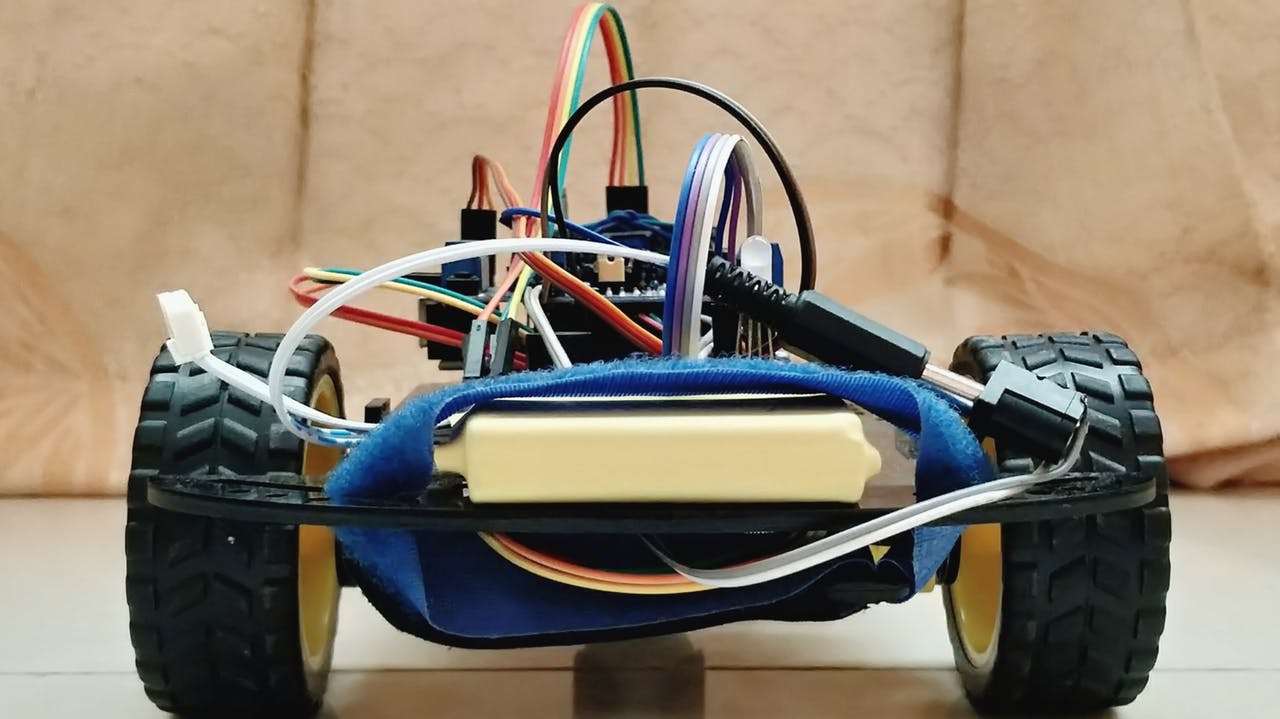
Tutorial – Construindo um Robo com IA com Arduino. Este artigo representa o design de um robô móvel que navega sozinho, evita obstáculos e indica movimento ativando uma determinada cor do LED RGB Difundido.
Tutorial – Construindo um Robo com IA com Arduino
Construindo um Robo com IA com Arduino. O robô é construído sobre a plataforma Arduino para processamento de dados e seu software ajudou a integrar códigos de montagem apropriados para os quais ele pode decidir como manobrar em torno dos obstáculos.
O robô desenvolvido é totalmente autônomo e não requer intervenção do usuário durante sua operação. Depois de carregar os códigos inicialmente e colocá-lo em um ambiente desconhecido com obstáculos, o robô se moveu evitando todos os obstáculos com considerável precisão.
A integração de um sensor de distância ultra-sônico colocado em um servo motor forneceu uma precisão muito maior na detecção de obstáculos ao redor.
Este robô ganhou mais precisão com a implementação de uma campainha e uma luz difusa através da qual pode indicar o modo de detecção de obstáculos, bem como a velocidade do robô em diferentes situações.
Construindo um Robo com IA com Arduino. Como um robô totalmente autônomo, ele pode atravessar ambientes desconhecidos sem se danificar e este método pode ser usado para melhorias adicionais para aumentar a adaptabilidade da detecção de obstáculos em diversas situações.
Peças que você ira usar |
Componentes do Hardware:
 |
|
× | 1 | |||
 |
|
× | 1 | |||
 |
|
× | 2 | |||
 |
|
× | 1 | |||
 |
|
× | 1 | |||
 |
|
× | 3 | |||
 |
|
× | 1 | |||
 |
|
× | 20 |
Interpretação:
As bibliotecas incluídas no código de bloco são as seguintes,
AFMotor.h
Servo.h
As conexões definidas atribuídas no código embutido são as seguintes,
define BuzzPIN A0
define TrigPIN A1
define EchoPIN A2
define LEDBPIN A3
define LEDGPIN A4
define LEDRPIN A5
define DCMROFF 25
Os algoritmos esperados renderizados na arquitetura robótica são os seguintes:
- Capacidade de detectar obstáculos em seu caminho com base na distância limite predeterminada.
- Procure um novo curso para uma direção relativamente aberta, tomando uma decisão inteligente.
- Indique o modo de detecção de velocidade e obstáculos por LED RGB Difuso e campainha.
Visualize a Diagramação:
Clique e acesse:
Codigo
Programa do Arduino:
#include <AFMotor.h>  // Add Adafruit Motor Shield for Arduino kit library.
#include <Servo.h>    // Add Servo Motor library.
#define BuzzPIN A0  // Assign PIN A0 as BuzzPIN (Connect Arduino UNO "A0" PIN with Buzzer "+" PIN).
#define TrigPIN A1  // Assign PIN A1 as TrigPIN (Connect Arduino UNO "A1" PIN with Ultrasonic Sonar Sensor "Trig" PIN).
#define EchoPIN A2  // Assign PIN A2 as EchoPIN (Connect Arduino UNO "A2" PIN with Ultrasonic Sonar Sensor "Trig" PIN).
#define LEDBPIN A3  // Assign PIN A3 as LEDBPIN (Connect Arduino UNO "A3" PIN with RGB Diffused Common Cathode "LEDB" PIN).
#define LEDGPIN A4  // Assign PIN A4 as LEDGPIN (Connect Arduino UNO "A4" PIN with RGB Diffused Common Cathode "LEDG" PIN).
#define LEDRPIN A5  // Assign PIN A5 as LEDRPIN (Connect Arduino UNO "A5" PIN with RGB Diffused Common Cathode "LEDR" PIN).
#define DCMROFF 25  // This sets Offset to allow differences between the two DC traction Motors.
AF_DCMotor M1 (1, MOTOR12_64KHZ); // Create DCMotor #1 using M1 output, Set to 64kHz PWM frequency.
AF_DCMotor M2 (2, MOTOR12_64KHZ); // Create DCMotor #2 using M2 output, Set to 64kHz PWM frequency.
Servo SER1; // Create Servo object to control Servo.
int Search (void) {                   // Integer type variable declaration.
  float Duration = 0.0;               // Float type variable declaration.
  float CM = 0.0;                     // Float type variable declaration.
  digitalWrite (TrigPIN, LOW);        // TrigPIN output as 0V (Logic low level).
  delayMicroseconds (2);              // Delay for 2us, Send 10 us high pulse to Ultrasonic Sonar Sensor "TrigPIN".
  digitalWrite (TrigPIN, HIGH);       // TrigPIN output as 5V (Logic high level).
  delayMicroseconds (10);             // Delay for 10us.
  digitalWrite (TrigPIN, LOW);        // TrigPIN output as 0V (Logic low level).
  Duration = pulseIn (EchoPIN, HIGH); // Start counting time, Upto again EchoPIN back to logic "High Level" and puting the "Time" into variable called "Duration".
  CM = (Duration/58.8);               // Convert Distance into CM.
  return CM;                          // Return to CM.
}
int RightDistance, LeftDistance;  // Distances on either side.
float Distance = 0.00;            // Float type variable declaration.
void setup () {               // Setup loop.
  pinMode (BuzzPIN, OUTPUT);  // Declare BuzzPIN as "Output PIN".
  pinMode (TrigPIN, OUTPUT);  // Declare TrigPIN as "Output PIN".
  pinMode (EchoPIN, INPUT);   // Declare EchoPIN as "Output PIN".
  pinMode (LEDBPIN, OUTPUT);  // Declare LEDBPIN as "Output PIN".
  pinMode (LEDGPIN, OUTPUT);  // Declare LEDGPIN as "Output PIN".
  pinMode (LEDRPIN, OUTPUT);  // Declare LEDRPIN as "Output PIN".
  SER1.attach (10);           // Attaches the Servo on pin 10 (SER1 on the Adafruit Motor Shield for Arduino kit to the Servo object).
}
void loop () {                                    // Main loop.
  SER1.write (80);                                // Tells the Servo to position at 80 degrees (Facing forward).
  delay (100);                                    // Delay for 0.1s.
  Distance = Search ();                           // Measuring the Distance in CM.
  if (Distance < 30) {                            // If obstacle found in 30cm.
    digitalWrite (BuzzPIN, HIGH);                 // BuzzPIN output as 5V (Logic high level).
    digitalWrite (LEDBPIN, LOW);                  // LEDBPIN output as 0V (Logic low level).
    digitalWrite (LEDGPIN, LOW);                  // LEDGPIN output as 0V (Logic low level).
    digitalWrite (LEDRPIN, HIGH);                 // LEDRPIN output as 5V (Logic high level).
    M1.setSpeed (100);                            // Speed down.
    M2.setSpeed (100);                            // Speed down.
    ChangePath ();                                // If forward is blocked Change direction.
  }
  else if ((Distance >= 30) && (Distance < 60)) { // If obstacle found between 30cm to 60cm.
    digitalWrite (BuzzPIN, LOW);                  // BuzzPIN output as 0V (Logic low level).
    digitalWrite (LEDBPIN, HIGH);                 // LEDBPIN output as 5V (Logic high level).
    digitalWrite (LEDGPIN, LOW);                  // LEDGPIN output as 0V (Logic low level).
    digitalWrite (LEDRPIN, LOW);                  // LEDRPIN output as 0V (Logic low level).
    M1.setSpeed (150);                            // Speed increase slightly.
    M2.setSpeed (150);                            // Speed increase slightly.
    Forward ();                                   // Robot move to Forward direction.
  }
  else if ((Distance >= 60) && (Distance < 90)) { // If obstacle found between 60cm to 90cm.
    digitalWrite (BuzzPIN, LOW);                  // BuzzPIN output as 0V (Logic low level).
    digitalWrite (LEDBPIN, LOW);                  // LEDBPIN output as 0V (Logic low level).
    digitalWrite (LEDGPIN, HIGH);                 // LEDGPIN output as 5V (Logic high level).
    digitalWrite (LEDRPIN, LOW);                  // LEDRPIN output as 0V (Logic low level).
    M1.setSpeed (200);                            // Speed up.
    M2.setSpeed (200);                            // Speed up.
    Forward ();                                   // Robot move to Forward direction.
  }
  else {                                          // If obstacle cannot be found in 90cm.
    digitalWrite (BuzzPIN, LOW);                  // BuzzPIN output as 0V (Logic low level).
    digitalWrite (LEDBPIN, HIGH);                 // LEDBPIN output as 5V (Logic high level).
    digitalWrite (LEDGPIN, HIGH);                 // LEDGPIN output as 5V (Logic high level).
    digitalWrite (LEDRPIN, HIGH);                 // LEDRPIN output as 5V (Logic high level).
    M1.setSpeed (250);                            // Speed increase fully.
    M2.setSpeed (250);                            // Speed increase fully.
    Forward ();                                   // Robot move to Forward direction.
  }
}
void ChangePath () {         // Path Change loop.
  Stop ();                   // Robot Stop.
  Backward ();               // Robot run Backward direction.
  Stop ();                   // Robot Stop.
  SER1.write (12);           // Check Distance to the Right.
  delay (500);               // Delay for 0.5s.
  RightDistance = Search (); // Set Right Distance.
  delay (500);               // Delay for 0.5s.
  SER1.write (160);          // Check Distance to the Left.
  delay (1000);              // Delay for 1s.
  LeftDistance = Search ();  // Set Left Distance.
  delay (500);               // Delay for 0.5s.
  SER1.write (80);           // Return to center.
  delay (500);               // Delay for 0.5s.
  CompareDistance ();        // Find the longest distance.
}
void CompareDistance () {                   // Distance Compare loop.
  if (RightDistance > LeftDistance) {       // If Right is less obstructed.
     TurnRight ();                          // Robot Turn into Right direction.
    }
  else if (LeftDistance > RightDistance) {  // If Left is less obstructed.
      TurnLeft ();                          // Robot Turn into Left direction.
    }
  else {                                    // If both are equally obstructed.
      TurnAround ();                        // Robot Turn Around.
    }
}
void Forward () {   // Forward loop.
  M1.run (FORWARD); // Turn DCMotor #1 to Forward.
  M2.run (FORWARD); // Turn DCMotor #1 to Forward.
}
void Backward () {    // Backward loop.
  M1.run (BACKWARD);  // Turn DCMotor #1 to Backward.
  M2.run (BACKWARD);  // Turn DCMotor #2 to Backward.
  delay (500);       // Delay for 1s.
}
void TurnRight () {           // Right Turn loop.
  M1.run (BACKWARD);          // Turn DCMotor #1 to Backward.
  M2.run (FORWARD);           // Turn DCMotor #2 to Forward.
  M1.setSpeed (100+DCMROFF);  // Calibrate the Speed of DCMotor #1.
  delay (300);                // Delay for 0.7s.
}
void TurnLeft () {            // Left Turn loop.
  M1.run (FORWARD);           // Turn DCMotor #1 to Forward.
  M2.run (BACKWARD);          // Turn DCMotor #2 to Backward.
  M2.setSpeed (100+DCMROFF);  // Calibrate the Speed of DCMotor #2.
  delay (300);                // Delay for 0.7s.
}
void TurnAround () {          // Trun Around loop.
  M1.run (FORWARD);           // Turn DCMotor #1 to Forward.
  M2.run (BACKWARD);          // Turn DCMotor #2 to Backward.
  M2.setSpeed (100+DCMROFF);  // Calibrate the Speed of DCMotor #2.
  delay (700);               // Delay for 2.1s.
}
void Stop () {      // Stop loop.
  M1.run (RELEASE); // Release DCMotor #1.
  M2.run (RELEASE); // Release DCMotor #2.
  delay (100);      // Delay for 0.1s.
}



Puxa vida, muito obrigado por compartilhar tanto conteúdo de valor. Vou continuar seguindo o blog / site e compartilhando